
Ingredients
| 1 litre filtered water | |
| 30g sea salt (not iodised) | |
| 250g chillies, I used approx. 10-12 cayenne-style chillies or 5 jalapeños (keep different colours separate here otherwise you’ll end up with a dull-coloured sauce) | |
| carrot, red capsicum, dried apricots or other fruit (or a mixture, total weight of approx. 125g) | |
| 3 cloves garlic, peeled |
At its most basic, chilli, salt and water are all you need here to make a hot chilli sauce. I like to add some garlic for flavour, while vegetables and fruits such as carrots, capsicums and dried apricots (or fresh fruit) help to add a touch of sweetness and can temper the heat of chillies. I use a non-iodised sea salt and filtered water as chlorinated water can impact the fermentation process. I use 3% brine solution for the fermentation erring on the side of caution, but you could go as low as 2% brine.
View the recipe collection here
Instructions
| 1. | Clean a 1-litre capacity jar with hot soapy water and rinse well. |
| 2. | To make the brine, heat half the water in a saucepan, add the salt, allow to dissolve, then top up with remaining water and cool before using. |
| 3. | Wearing gloves, remove the stems from the chillies and roughly chop the flesh. |
| 4. | If using carrot, peel and thinly slice. If using capsicums, remove the seeds and roughly chop. |
| 5. | Dried apricots can be left whole. Mix the fruit or vegetables with the chillies and garlic and put into the cleaned jar. |
| 6. | Pour in the cooled brine leaving a gap at the top. |
| 7. | You need to ensure that the vegetables are kept below the surface of the brine and not exposed to air – I use glass pickling weights and silicon airlocks. |
| 8. | If you don’t have these, fill a sealable bag with some of the remaining brine and put this on top of the vegetables to hold them down. |
| 9. | If using a sealable bag, cover loosely with cheesecloth and a rubber band to keep out bugs. |
| 10. | You can put on a lid but you will need to loosen it every day to allow carbon dioxide to escape. |
| 11. | Put the jar onto a tray to catch any overflow ferment and leave to ferment for 5-10 days in a cool, dark place. |
| 12. | Gas bubbles will appear and after a few days the brine will turn cloudy. |
| 13. | Once the bubbles subside (around day 5) start tasting the brine daily; the mix should taste acidic but with a nice flavour profile (if you have ph strips it should be lower than 4.6). |
| 14. | If you discover mould on your ferment, then I’d discard the whole batch. |
| 15. | Sometimes a ferment will get a thin white film sitting on top of the brine; this is known as Kahm yeast. It is generally considered safe to eat (although it may produce tainted ‘off’ flavours). As it sits on top of the brine, you should be able to scoop it off. |
| 16. | Strain the mix and reserve the pickling brine. |
| 17. | Put into a blender with just enough of the brine to make a very smooth sauce. |
| 18. | I start with 100ml brine then add a little more as required. |
| 19. | I like my hot sauces a little thicker, but blend to your desired consistency. |
| 20. | At this point, if you taste and think it needs a little extra salt or umami try adding a little salt, soy sauce or miso to the mix. |
| 21. | You could add some honey or sugar if you think it needs a little sweetness (you will start a secondary fermentation so keep it in the fridge). |
| 22. | Adding a little vinegar can add a little extra flavour and it will increase the stability of the sauce, but I don’t bother as I find the hot sauce is usually acidic enough. The heat of the chilli will mellow over time. |
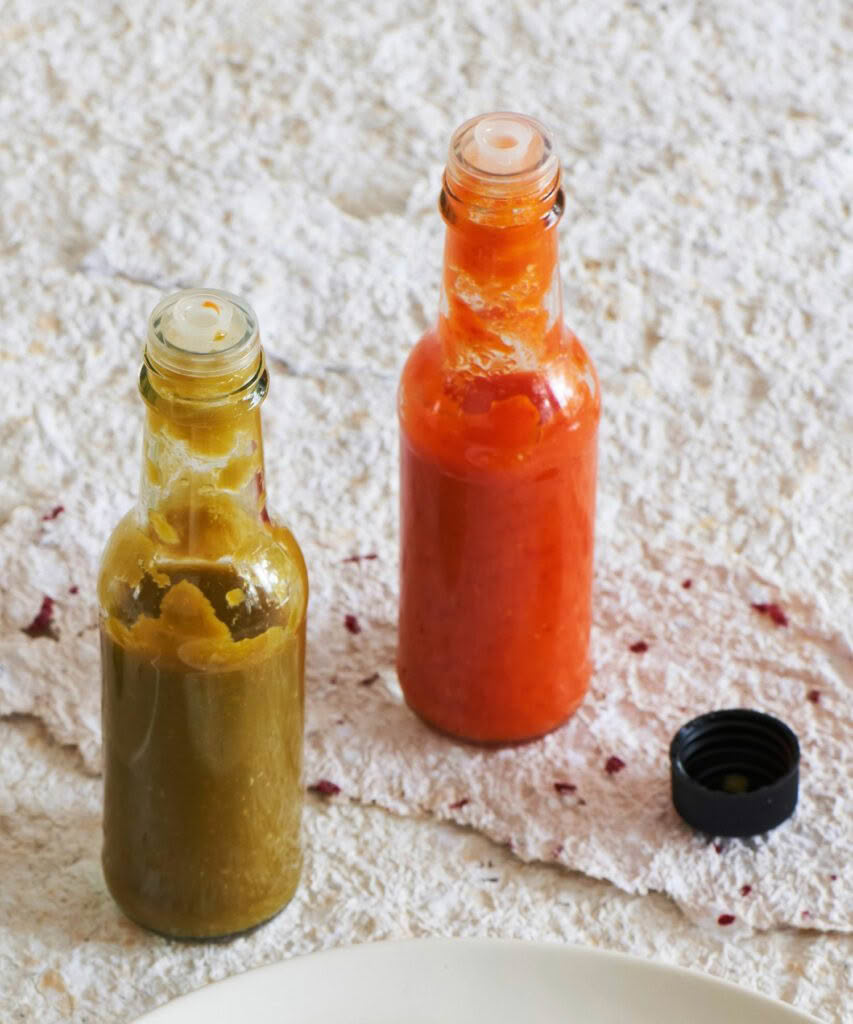
| 23. | Pour into clean, sterilised bottles. Be aware that it will keep fermenting, but at a much slower rate, so leave the lid loosely attached, or use squeeze sauce bottles which allow for a little expansion, especially if you leave the nozzle uncapped. |
| 24. | The leftover brine is excellent in salad dressing or used in other ferments. |
| 25. | Keep in the fridge. Drizzle as much as you like on everything. |
Recipes & food styling Ginny Grant / Photography Aaron McLean / Styling Jess Hemmings